Showing posts with label windows. Show all posts

Tuesday, May 26, 2015

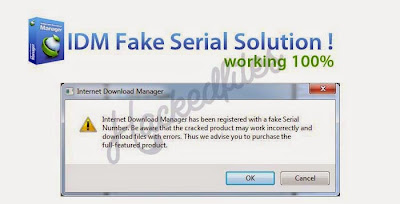
Tricks to Disable Pop-up "Fake Serial Number" in IDM

Are you annoyed of Fake Serial Notice that Pops-up on your Screen when you're using Internet Download Manager? Even though you have already activated that crack for it, still fake serial pops-up, really annoying isn't it?

Today Im going to give you very simple to follow tutorial on how to Disable Pop-up "Fake Serial Number in IDM" please follow step by step guide carefully. Any wrong step might lead to a system failure so do it at your own risk:

Step 1: Run "regedit"
By pressing Windows Key + R button simultaneous Run Dialog will Pop up and type in "regedit" then press Enter

Step 2: Go to  / Navigate to: HKEY_CURRENT_USER\Software\downloadManager

Step 3: Find the name CheckUpdtVM and modify 10 to 0 (that's from ten to ZERO)

Step 4: Close Regedit and Tadahh~@#$!@.......... You're done. Congratulation you're PC won't show any Fake Serial Number Popup on your Screen.

Thursday, March 5, 2015

Windows 8.1 with Update x86 x64 12in1 Activated AIO by m0nkrus

Windows 8.1 with Update x86/x64 12in1 Activated AIO by m0nkrus (2014/RUS/ENG) | 4,19 GB
Language: English / Russian


I asked for a very long time to release the assembly Windows 8.x with avtoaktivatsii by analogy with the builds of Windows 7. But some circumstances (ie, lack of adequate medication , then wait another " final " distribution , my personal problems ) prevented this . Nevertheless, I would cease to respect myself if deceived those who had been waiting for this release , who had hoped for me. And then, finally , he is before you . Please love and favor ! Efficiency of the assembly carefully checked .


Assembly includes 6 versions 6 and Russian versions Russian version for Windows 8.1 32 -bit (x86) and 64 -bit (x64) kernel :
Windows 8.1 Professional x86 Russian
Windows 8.1 Professional x86 English
Windows 8.1 Professional x64 Russian
Windows 8.1 Professional x64 English
Windows 8.1 Professional with WMC x86 Russian
Windows 8.1 Professional with WMC x86 English
Windows 8.1 Professional with WMC x64 Russian
Windows 8.1 Professional with WMC x64 English
Windows 8.1 Enterprise x86 Russian
Windows 8.1 Enterprise x86 English
Windows 8.1 Enterprise x64 Russian
Windows 8.1 Enterprise x64 English

FAQ:
Q: What is cut or modified for systems installed with this assembly ? What programs are added ?
Answer: Look under spoiler "Some features of the assembly ."

Question: Can I turn on automatic update system installed with this assembly ?
Answer: Yes, you can use the auto-update .

Q: Where is the file install.wim? My favorite program to install / deploy the image on the flash drive without it will not work .
Answer: In this assembly is used instead of the install.wim install.esd. This format has a more serious degree of compression . Due to this assembly fits on DVD5-disc . And if your favorite program does not understand this format and does not support , you should think , not whether to change it to any more universal .

Q: I did not receive pre-boot menu with a choice bit installers . Why ?
A: Your computer supports deployments with EFI / UEFI and chose this mode to install. Installing EFI / UEFI is only possible using the 64 -bit installer , and therefore have no choice.

Question : I need a setting in BIOS mode on the MBR- section , and the system is in the mode of EFI / UEFI on GPT- section . What to do?
Answer: Go to UEFI-BIOS and change the setting there , responsible for selecting the mode of installation. In UEFI-BIOS different manufacturers its name and location are different, so what exactly tell what to do in your case, I can not. Just browse through all the options and look for the name of the EFI or UEFI. How to find and change this setting to one that will contain the word BIOS.

Q: You wrote that the system is set up with two languages ??at once . But after installing the English version of Windows 8.1, the list of available interface languages ??I see only English . How so?
Answer: Yes, indeed , there is. What is the reason , I do not know . Everything was going on for years proven techniques. And yet, it is only a minor flaw , not more . Russian language , as I said , also installed. Just do not appear in the list . In the language selection , click on the button "Add Language " and choose among other Russian . All are welcome to enjoy ! The whole procedure can be done even offline , because the language is already installed and additionally download it ofsayta not required.

Question: How do I , using only the distribution, without connecting to a network install . NET Framework 3.5?
Answer: Run the installer : \ support \ framework_3.5 \ dotNetFx35_W8.1_ru-en_x86-x64.exe and follow the installation wizard .

Q: Should we expect from you with an activator assembly based on a combination of three components : SLIC- table , the certificate and key ?
Answer: Unfortunately, this method of activation in Windows 8.x does not work. So , nothing like this simply will not be able to create .

Q: I want to install without activation to subsequently activate the key for Windows 8 or distributed in its time free key for Windows Media Center (WMC). What to do?
Answer: With keys for Windows 8 and for WMC really can activate Windows 8.1. But it is precisely that activate an already installed system ! During the installation, use them useless. In order not disturbing you embedded in an assembly activator key entry window installer , specify the following keys Dummy : C3MCJ-RQXB6-WCHYG-C9WKB ( for Professional), GBFNG-2X3TC-8R27F-RMKYB-JK7QT ( for Professional with WMC) or FHQNR-XYXYC-8PMHT-TV4PH-DRQ3H ( for Enterprise). After installation , open the console window as administrator and type "slmgr / ipk " without quotes. After that , if your key is REALLY valid , then initiate the activation of the standard tools via the Internet or using the command "slmgr / ato". If you have reason to doubt that it will work in the same console window , enter the command "slui 4" and use the phone activation .

Question: What kind of keys are shown in the prompt to install Windows 8.1 out of an already installed system ?
Answer: This dongle keys Dummy - keys that were originally built into Microsoft distributions to replace " vacancy " until the user enters their license key . These keys are only valid for select editions . Not to activate .

Q: You wrote that built- in assembly activator can activate Office 2010 VL and Office 2013 VL. How to do it ?
Answer: There is nothing complicated . Start activator with a label "KMS-activation", which is located in the Start menu Windows 8.1, and you just choose the activation mechanism .

Q: You wrote that the 64-bit edition of the OS with this assembly can not install the update on Windows 7/8.x, but you can initiate a custom installation. What is the difference between the update installation and custom installation ? Should I be worried because you can not install an update?
Answer: When you install the update , all files , programs, settings, a previous installation , if possible (if they are compatible ) , will be integrated into the new OS . But also , I would like to note that all file system errors, registry , etc. may also move into the new OS. A custom installation over the old OS , the entire contents of the OS is stored on the system partition HDD / SSD in the folder Windows.Old, where it then , if necessary, will be transferred to the newly installed OS. After " pulling " the desired content Windows.Old folder can be safely deleted. There is another option Custom installation - when a folder is created Windows.Old all. This is possible if you decide to repartition or format the system partition HDD / SSD.

More about MSDaRT:
A set of tools Microsoft Diagnostics and Recovery Toolset (MSDaRT) helps to diagnose and troubleshoot the system arising from the start, as well as other problems.

The kit includes the following tools:
- Registry Editor . Utility Registry Editor ERD provides information about the registry , which can help in recovery .
- Master password changes . To display the local user accounts and change the passwords you can use the wizard to change passwords .
- Crash Analyzer . To identify the causes of system failure and determine which driver caused the failure , you can use the wizard failure analysis .
- Restore files . File recovery utility can be used to find and recover deleted files from the file system NTFS or FAT.
- Disk Commander. To restore a partition or volume , you can use the application Disk Commander.
- Disk Cleanup. To delete the data on the disks and volumes , you can use the Disk Cleanup utility .
- Computer Management. Computer Management utility provides recovery tools for a wide range of administrative tasks .
- Explore. Utility Explorer lets you browse files and folders that are stored on different disks .
- Master -making. Master recommends making the most appropriate tool to remedy the situation , and provides step by step instructions for diagnostics .
- Configure TCP / IP. Utility Configuring TCP / IP helps to display and configure TCP / IP.
- Removing patches. By using the remote fixes can remove a Windows hotfix or service pack, which can not be run .
- System File Checker . System File Checker tool allows you to check and restore corrupted or missing system files .
- Search . Search utility allows you to limit your search by specifying the name, location search , the approximate size of the file or the file modification time .
- Defender . Individual means of checking to determine malware or other unwanted programs and provide warnings of potential danger .
- Remote connection . The possibility of establishing a remote connection service of those . Support for problem solving.
Get more detailed information about the tools included in the package , can be of help file , available in the main window MSDaRT.
Starting the MSDaRT 8.1, from the service recovery triggered from the installation media :

System requirements :
Processor: 1 gigahertz ( GHz ) or higher.
RAM: 1 gigabyte (GB ) for the 32-bit version or 2 GB for 64- bit version.
Free hard disk space: 16 gigabytes (GB) for the 32-bit version or 20 GB for 64- bit version.
Graphics card : graphics device Microsoft DirectX 9 or later .
Additional requirements to use certain features.
To use the touch features require tablet or monitor that supports multitouch .
To access the Windows Store to download and run applications that require an active internet connection and a screen resolution of at least 1024x768 pixels . To bind the application requires a minimum screen resolution of 1366x768.

MD5- sum image : 53b6f1ab49ff7e595aedfab70b8c9af2
SHA1- sum image : 96ec579953506a6f734f644012cd9a92bac72524

Year: 2014
Program Version: 6.3.9600.17031.140221-1952
Bit : x86-x64
Official site : Microsoft
By assembling : m0nkrus
Language: English / Russian
Treatment: not required ( the installer is already disinfected )
Image size : 4.19 GB

Zip Password: hackedfiles.blogspot.com D0WNL0AD LINKS:
Download

Filesize: 4.19GB

Windows 8.1 with Update x86 x64 12in1 Activated AIO by m0nkrus

Tuesday, May 20, 2014

Bypass Windows Folder Security Check(Access Denied) to Access and Enter into Protected folders

Many of my friends asked me that, some times they cannot enter into some system folders and files of Windows XP, 7. When they to enter into those folders, a error or security message prompt is shows like “This folder access is denied” or “You cannot access this folder due to security reasons”or “Location is unavailable”. Why it happens? Because actually there is an another hidden administrator on your windows system which is called “System Administrator”. System administrator always try to protect your windows from being unauthorized access.
Now you have to do a little hack(trick) to access any protected folder or file and take control over it. It’s not a crack. You have to make changes to the registry settings to get the administrative power to browse system folders and open protected files.
Editing registry manually is not suitable for all jobs on windows computer. Some times it is risky and also confusing.

So you have to use a specific registry editor reg file to edit registry settings to take access on folders and files.
TakeOwnerShip.reg is the most famous and safe registry editor to take control over protected files and folders.
Now let’s take a tour of this job.

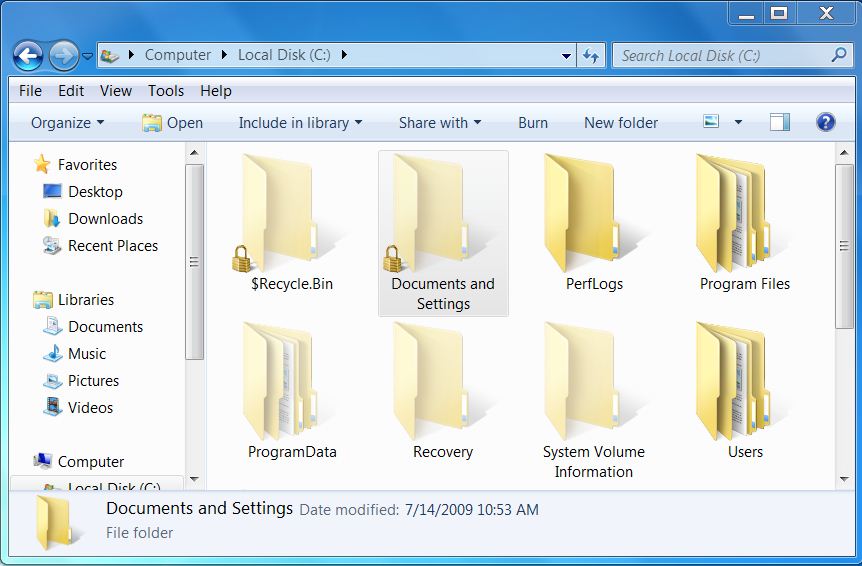
1. Now I will try to enter into a protected ‘Documents and Settings’ folder without taking control or editing registry. So it will show an error message.

protected system folder ‘Documents and Settings’
error: Access is denied.
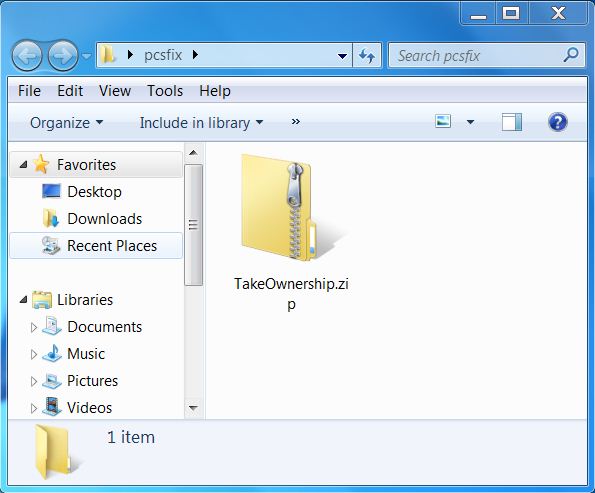
takeownership for bypass system security check
3. Enter into the zip package and you will see to registry editor file. One is InstallTakeOwnership.reg and another is RemoveTakeOwnership.reg.
installtakeownership.reg and removetakeownership.reg
4. Now click on InstallTakeOwnership.reg file and you will be prompt with a security message as below.
edit registry settings
5. Click on yes to edit registry settings. And ok.
confirm registry settings
6. Now go to the folder where you wan
t to enter. And right click on the folder.
select takeownership to take control.
7. In the right click menu you will see a new entry ” Take OwnerShip”. Select it.
8. After selecting Take Ownership, you will be prompted with a security message. Select yes to proceed.
9. Now you will see a running windows dos command window as below, which is granting your access.
10. After finishing this automatic dos command prompt, you will have access to enter into that folder.
11. For example, I have now power to enter into ‘Documents and Settings ‘ folder.
12. Do the same for other folders and files to bypass system security check.
Don’t forget to leave comments to share your opinion about this article. Thanks.

Friday, May 2, 2014

M File Anti-Copy - prevent files and folders from being copied or deleted with Keygen


Let's suppose that your computer is shared with other people and you don't want them to be able to copy, move or delete your files and folders or to run your applications. Using Windows alone is not a solution, as the program doesn't have a feature for this. M File Anti-Copy allows you to protect your information against copying, deleting or running. It's a Windows program with an intuitive installation wizard and a nice looking graphical interface.

Once run, the program will ask the user to set a master password. Without this password, the program's settings cannot be accessed and, as such, all the program's settings will be protected against unauthorized modifications. After the password is set, the user can configure the files and folders that should be protected from being copied. The program can protect all the files and folders stored on the hard disk, specific drives or specific files and folders. It can also protect certain file types against copying.

Besides protecting files and folders from being copied, M File Anti-Copy can also protect all the files and folders stored on the hard disk against deletion. This is very useful for keeping all your personal information safe. Using this option, not even viruses will be able to delete your information.

The program includes a feature for easily copying or moving files and folders from a location to another. Besides that, certain programs can be protected from running. Even USB devices can be protected from being recognized by Windows when they are connected to the computer. This can avoid USB viruses from spreading into the system.

Despite the fact that there are a lot of options included in the program, all of them are intuitively named, so that the user doesn't need time to get used to the interface. When not used, the program can be set to run from the system tray, for not cluttering the desktop.

Pros:
It can protect any file, folder or drive from copy operations. Besides that, it allows the user to copy files and folders directly from the interface. Furthermore, it can protect files and folders from being deleted. What's more, certain programs and even USB drives can be blocked from being launched. More to say, the software's settings cannot be accessed without entering the master password.

Cons:
Some features are not available in the trial version.

M File Anti-Copy is a tool for protecting all your files and folders from being copied, deleted or launched.

Download Here:  M File Anti-Copy 5.5 with Keygen
password: hackedfiles.blogspot.com

Installation Step by Step with Keygen


Download Here:  M File Anti-Copy 5.5 with Keygen
password: hackedfiles.blogspot.com

Monday, July 22, 2013

Windows.Loader v2.2 Daz


Currently, many steps still to ask how to crack Windows 7 easy and successful. And the answer is to use tools Windows.Loader v2.2 Daz. How much Uncle install without a key win 7 then it just dragged on, just one click, restart the Windows 7 has been activated and Good.
This is the loader application that's used by millions of people worldwide, well known for passing Microsoft's WAT (Windows Activation Technologies) and is arguably the safest Windows activation exploit ever created. The application itself injects a SLIC (System Licensed Internal Code) into your system before Windows boots; this is what fools Windows into thinking it's genuine.

Features

Can be run as a standalone application Works well with all system languages Custom OEM information can be installed Argument support for silent installs Can be used for pre-activation Application integrity checking Custom error handling Support for hidden partitions and complex setups Can work alongside Linux's GRUB or any other boot manager Works with TrueCrypt and many other types of hard drive encryption applications Add your own certificates and serials externally Offers certificate and serial installation only for users with an existing SLIC 2.1 Automated system profiling (The application matches everything up for you)

The rundown

Compatible with Windows 7 SP1 and all system updates ✔ check Will run on x86 and x64 systems ✔ check No core system files get modified ✔ check No extra processes are run so you have nothing eating at your RAM All key parts of the exploit are encrypted with a custom encryption The exploit runs before Windows so it's harder for Microsoft to prevent The exploit patches all necessary tables making activation look authentic The application will select the best profile for your system during installation Each and every user has a unique version of the exploit installed on his/her system

Supported operating systems

Windows 7 Ultimate Windows 7 Ultimate E Windows 7 Professional Windows 7 Professional E Windows 7 Home Premium Windows 7 Home Premium E Windows 7 Home Basic Windows 7 Starter Windows 7 Starter E Windows Vista Ultimate Windows Vista Business Windows Vista Business N Windows Vista Home Premium Windows Vista Home Basic Windows Vista Home Basic N Windows Vista Starter Windows Server 2008 R2: Enterprise Windows Server 2008 R2: Standard Windows Server 2008 R2: Foundation Windows Server 2008: Enterprise Windows Server 2008: Standard Windows Server 2008: Foundation Windows Small Business Server 2008

Note: You must be running build 7600 or greater for Windows 7 and Windows Server 2008 R2. Note: I don't recommend using any of the Windows 7 E editions. Note: Windows 7 N editions will only be supported when OEM SLP serials leak.

Application integrity checking? Hover your mouse over the green, amber or red icon to see detailed application information.

Note: Even if the icon is green someone might have found a way around the protection system so it's worth checking that the applications path is always the same as the location from which you launched the application. You should also check that the MD5 matches the MD5 found online.

Changes in version 2.2.1 * Added a new GRLDR * Redesigned the advanced options tab and added an option to relocate the RSDP to the EBDA * Added Seneca and Twinhead Windows 7 Professional keys * Added BenQ Windows 7 Home Premium key * Added Seneca SLIC and certificate * Other minor tweaks and fixes


Download:

Thursday, December 13, 2012

Change your Windows XP Service Pack 2 to Service Pack 3 without re-Installation

Are you using Windows XP SP2? but cannot install some apps and requiring you to upgrade to SP3? Now this is one of the best solution you can find in the Internet. I made a tutorial about changing your windows xp service pack 2 to service pack 3. Note that it will only change the name from Service Pack 2 to Service Pack 3 to bypass whatever software requiring you to install or upgrade Service Pack 3, and probably may cause future problems.

 Below are the simple steps.

 Step 1: Run Regedit by Clicking on Start -> Run , type in regedit and press enter

Alternatively you can just press Ctrl + R and type regedit

(Optional) Step 2: Make a backup of your registry (just in case)

 Step 3: Browse to "HKEY_LOCAL_MACHINE\SYSTEM\ CurrentControlSet\ Control\ Windows"

 Step 4: Modify the value of "CSDVersion" from "0x00000200" (SP2) to the Windows XP SP3 value of "0x00000300"

 Step 5: Close registry editor

 Step 6: Reboot

 Hope It Helps!!!

Thursday, December 6, 2012

Microsoft Office 2013 Preview (Activated)

Download Link

Office 2013 (English, 32-bit): Click Here 
Office 2013 (English, 64-bit): Click Here
Activator

Download Microsoft.Toolkit.v2.5.2.zip

Filesize: 48MB


How to Activate

Open the  Office Toolkit.
- Go to Settings (Global Tab) and delete the "KMS PID To Use For Office" it should be left blank.
- And then go to AutoKMS Tab and remove the check in the box of Activate Windows and press Save Button.
- Press Microsoft Office Logo Button.
- and go to Activation Tab then choose the MultiKMS from Dropdown menu and press Install button.

Last 3 Steps:
Run your CMD and type the following text:

cd C:\Program Files\Microsoft Office\Office15 (to those who install 32bit version the use 32bit Operating System)
cd C:\Program Files (x86)\Microsoft Office\Office15 (to those who install 64bit version the use 64bit Operating System)
cd C:\Program Files\Microsoft Office\Office15 (and this is for 64bit)
then type: cscript OSPP.VBS /sethst:127.0.0.1
then again type: cscript OSPP.VBS /setprt:1688
and lastly type this to activate your Office 2013: cscript OSPP.VBS /act

Serials:
FCMXC-RDWMP-RFGVD-8TGPD-VQQ2X
NVWXW-WWVFR-D6HKK-MW2BD-DV2KJ
46JNH-TM96J-GYW2K-G6C23-8K4C8
GWFPD-YNW9D-FQWQW-3V3JY-TXR9J


Tuneup Utilities 2013 with Patch and Tutorial


Over 30 tools speed up, clean and optimize your PC. With a robust set of new features, TuneUp Utilities 2013 now has powerful weapons on the market to fight data clutter.


The brand new TuneUp Disk Cleaner is one of the most comprehensive and safest PC cleaners available. It quickly and thoroughly deletes program residue and data clutter to give your PC air to breathe, run faster and more reliably. The improved TuneUp Registry cleans registry entries better than ever, while the enhanced TuneUp Shortcut Cleaner remains unmatched in removing orphaned shortcuts. Plus, the new TuneUp Process Manager helps you identify all those resource-hungry applications that hinder PC speed and performance.


That's not all. The TuneUp Browser Cleaner quickly and easily protects your privacy by deleting traces left by Internet Explorer, Google Chrome, Opera, Safari, Firefox and other browsers, while also optimizing browser databases. The improved TuneUp Live Optimization provides performance boosts when you need them by recalling which programs and processes slow down your PC and allowing you switch these to "Standby" mode, with the help of TuneUp Program Deactivator.


In addition, TuneUp Process Manager helps you detect resource-hungry applications even faster. The easy-to-understand information on all background processes shows you exactly what's running on your PC. And last, but not least, the new cleaning features raise 1-Click-Maintenance and Automatic Maintenance to a completely new level in PC optimization. TuneUp Utilities 2013 also includes other unique technologies: The Program Deactivator restores over 50% of speed and free space on bogged-down PCs, while TuneUp Economy Mode improves battery life by up to 30%.


TuneUp Utilities 2013 supports Microsoft's brand new Windows 8.

What's new in this version:

  • The display of results in TuneUp Disk Cleaner is improved.
  • The use of TuneUp Styler on Windows 8 has been optimized.
  • The most popular TuneUp modules can now be accessed from the TuneUp taskbar icon context menu.
  • The TuneUp Browser Cleaner results communication has been improved.
  • TuneUp Registry Cleaner now cleans your registry even faster.


Download TuneUp Utilities 2013


Patching Instruction:
1. Go to your Desktop and Right Click the TuneUp Utilities Icon.
2. Select Properties > Find Target > and Paste the tuneup.utilities.2013-patch.exe on that folder.
3. Run the Patch and its done.

Patch


Wednesday, November 28, 2012

Windows Activators!! Genuine ANY WINDOWS EDITION


This tool allow you to active a non Genuine Windows Operating System. Genuine Operating System allows you to update any latest software update produced by Windows OS. Enjoy


WIndows Activator 9.0 Supports:

Winows 95,98,NT,2000,XP,Vista,7 All Editions
Windows Server 2000,2003,2008 All Editions

Windows 7 Activator Supports All Windows 7 Versions

I Swear these Activator Are Clean

Download

Monday, November 26, 2012

Creating a Bootable Windows XP and Windows 7 or Vista in 1 USB

Today I decided to make a tutorial on how to Create a bootable Windowx XP and Windows 7 on USB Flash Drive/Pen Drive because too many of people on the web requested it. There are alot of brand new laptop that don't have DVD-ROM and only support USB Port for slim and portability purposes so this one is one of the best tool we should has on our pocket when we have something to ReFormat or ReProgram.


Tutorial Guide

 1- We are going to make a USB with Windows XP + Windows 7.

2- You need a Windows based PC to work with this tutorial, and you need to work with elevated privileges “Run as administrator” whenever needed if you are working from a Windows Vista or 7 environment.

3- You need a minimum 4 GB USB 2.0 or 8 GB USB flash drive(depende sa size of both OS gagamitin)

4- You need to download the following files from (HERE) tapos EXTRACT nyo onto your desktop: - WinSetupFromUSB-Modified (11.3 MB) - bootfiles ( 658 bytes )

5- Open folder (WinSetupFromUSB-Modified) and right click on WinSetupFromUSB_0-2-3.exe and
choose to “Run as administrator” you would see the following , Press OK:
   
 6- Make sure you follow what you see in below before pressing on “RMPrep USB” button:  
 7- RMPREPUSB v.2.0.811 tool will pop up, so make sure everything is like what you see below before you press the “Prepare Drive” button.
 
8- Press “OK “on the next screen.
   
 9- Press “OK” on the next screen also:Note: (Sometimes the image Below will not appear just skip to the next step)
 
   
 10- Exit the PREPUSB tool:
   
 11- Now Insert the Windows XP CD into the drive bay and follow what you see below, my drive is H, yours maybe different:


 12- Now we will insert the Windows 7 installation DVD into the drive bay and follow below:
 

 13- Now OPEN folder (bootfiles) that you extracted from the RAR file you downloaded early in step 4 above, and copy all its contents to the USB thumb drive and replace all existing files there:
 
 
 14- Now you've DONE ...the USB drive is ready to be tested,boot from a USB device.
 

 “Win Setup from USB” tool, that worked perfectly nice, with no errors of any kind, and we are going to use it in this tutorial" PS: If you want to input Windows Vista instead of Windows 7 on USB you should use Vista installation media from step 12 onwards , and you should know that with this method you can’t input all 3 Windows (XP/ Vista / 7), that will not work, only 2 at a time you can choose . Enjoy and Good Luck!!